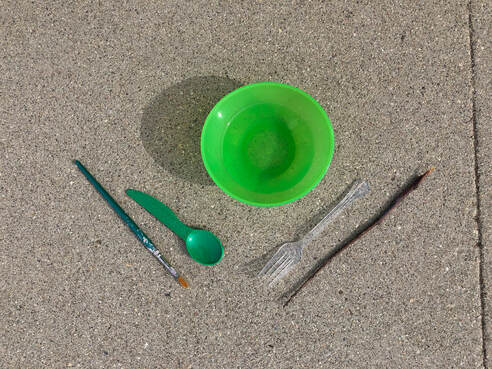
any other thing you think you could use instead of a paintbrush to move water
Academic Vocabulary and Pre-Art Activities:
VOCABULARY Lines: Lines are really just a series of connected dots or points that have two ends. You use lines to write letters. Lines can go up and down, side to side, or diagonally, like a slide. Lines may be thick and thin, long and short, curly, straight, or zig-zag.
THINK and DO Activity: Think about the lines you use to write the letters of your name.
Activity: Draw some lines in the air. Draw a line that goes up and down. Draw a line that goes from side to side. Draw a line that is diagonal, like a slide.
Be sure your lines start one place and end in a different place.
Make Art: Step #1: Take your water and tools outside. Find a safe place to make your water painting.
Step #2: Choose one of your painting tools. Dip it in water and see what kind of line you can paint with it. AND
Step #3: Choose a second tool. Experiment with this tool now. Can you create a different type of line?
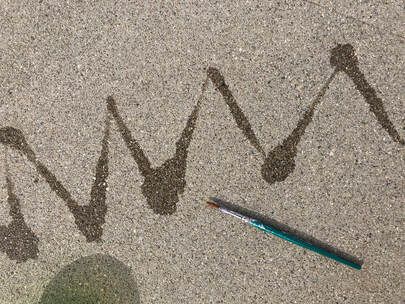
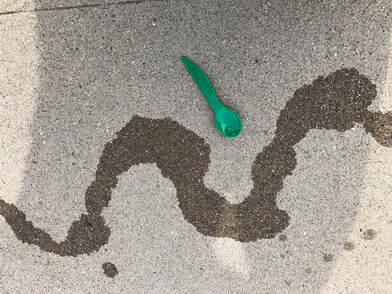
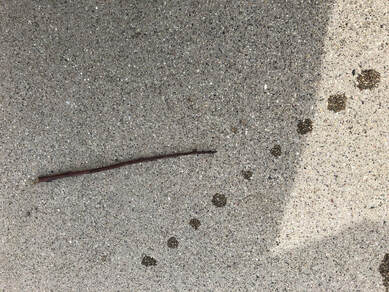
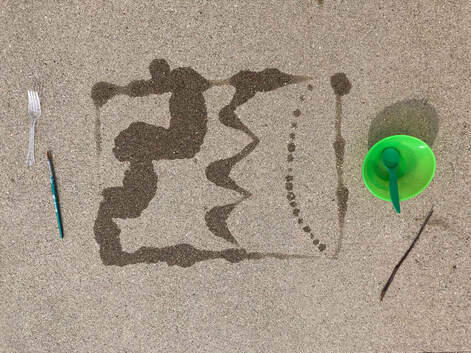
I used my paintbrush to paint a zig-zag line. I used my spoon to create a curvy line.
Step #4: Use any other painting tools you gathered up and see what kind of lines you can paint with them.
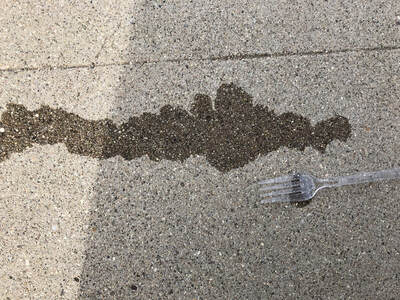
I used my fork to create a thick, messy line. I used my stick to create a dotted line.
Step #5: Paint a frame. Use all your tools to create a work of art that shows different types of lines.
Photograph your line paintings if you like!
THINGS TO THINK ABOUT AS YOU CREATE:
How quickly is the water drying? What kind of weather is it today? Which tools make interesting lines? Which tools are not working as well you wanted them to?
Follow-up Questions:
Think about the process of painting with water.
Which tools created your favorite lines? Why?
How did it feel to watch your water painting disappear?
Rubric: You may access the Lesson #1 - Water Painting Lines Assessment Rubric by clicking on the file below.